|
Notch filters are the easiest to use systems and work perfectly on cable
systems that haven't updated to more sophisticated systems. I know of at least 100
such cable companies in my local area.
Building a notch filter can be a little intimidating for those who aren't very
technologically inclined, but I assure you it is an easy enough process. If you
don't care to build your own, check out the ready-made filters available at Video Media.
NOTCH FILTER THEORY OF OPERATION
The low frequency version (channel 2 to 6 - 55 MHz to 90 MHz) of this kit has 4 poles.
Each pole has approximately 11 to 14 dB of attenuation at the resonant frequency. The high
frequency version channels 14 to 22 and channels 7 to 13 (100 MHz to 215 MHz) has 3 poles,
each pole has approximately 13 to 18 dB of attenuation at the resonant frequency.
The bandwidth (notchwidth) is approximately 300 to 500 kHz for each pole of either
filter design. Since each pole may be adjusted independently the notch depth and width are
somewhat variable and adjustable. If all poles of the Filter are set to the same resonant
frequency the overall depth will be 45 to 55 dB and the notchwidth will be approximately
0.5 MHz. However, if you set each pole of your filter to a different frequency the overall
depth will be approximately 1 5dB and the notchwidth will be 1.0 to 1.5 MHz.
If you want to "trap-out" an unwanted carrier it is normal to adjust all
poles to the same frequency. You could "trap-out" a carrier which has been
placed within in a TV channel between the color-burst signal and the audio carrier,
without any appreciable affect on either of the desired signals. This carrier that you
might want to remove normally causes a annoying beeping sound, and causes the picture to
be un-watchable. By removing only the unwanted carrier you can restore a good picture.

PARTS LIST
NOTE: The capacitors used in this kit may be disk or monolithic.
3ea	2.2 pF cer disk cap (2.2, 2R2@ 229)

lea	3.3 -  cer disk cap (3.3, 3R3, 339)

lea	4.7 pF cer disk (4.7, 479, 4R7)

2ea	5.6 pF cer disk cap (5.6, 5P6, 5R6, 569)

2ea	8.2 pF cer disk cap (8.2, 8R2, 829)

2ea	10	pF cer disk	(marked lOD, 100, 10)

2ea	12	pF cer disk	(marked 12 or 120)

2ea	18	pF cer disk	(marked 18 or 180)

2ea	22	pF cer disk	(marked 22 or 220)

2ea	27	pF cer disk	(marked 27 or 270, 27K)

2ea	33	pF cer disk	(marked 33 or 330)

2ea	56	pF cer disk	(marked 56 or 560)

2ea	5 1/2 turn slug tuned coil (alum core) .16 to .24 uH

3ea	3 1/2 turn slug tuned coil (alum core) .06 to .09 uH

lea	2 1/4 turn air coil 5/32" dia.

lea	1 1/2 turn coil 5/32" dia.

2ea	P C mount 'F' connectors

lea	P C board (080-00212A)
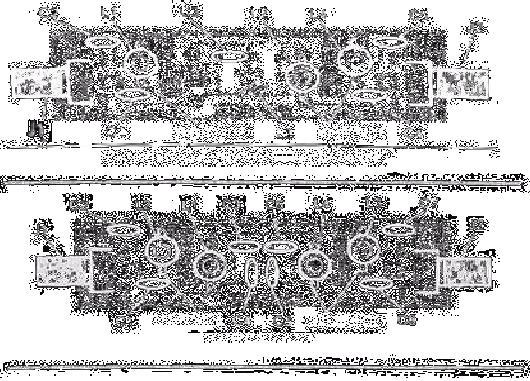
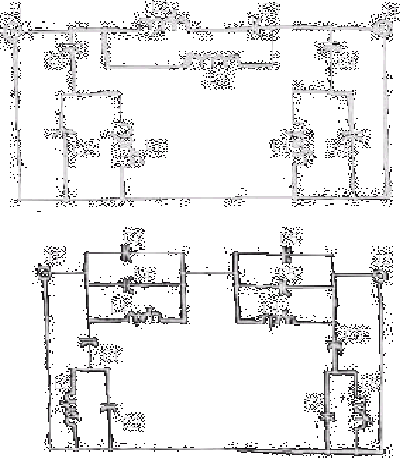
SCHEMATICS

CHART OF FREQUENCIES
4 - POLE FILTER FREQUENCIES
 Channel	Video Color           Audio

 2	 55.25	 58.83	 59.75

 3	 61.25	 64.83	 65.75

 4	 67.25	 70.83	 71.25

 5	 77.25	 80.83	 81.75

 6	 83.25	 86.83	 87.75
Bullet 103 MHz to 105.5 MHz Snooper 107.997 MHz
CHART OF FREQUENCIES
3 - POLE FILTER FREQUENCIES
Channel	VIDEO	COLOR	AUDIO

7	175.25	178.83	179.75

8	181.25	184.83	185.75

9	187.25	190.83	191.75

10	193 25	196.83	197.75

11	199.25	202.83	203.75

12	205.25	208.83	209.75

13	211 25	214.83	215.75

14	121 25	124.83	125.75
FILTER
15			127.25	130.83	131.75

16			133.25	136.83	137.75

17			139.25	142.83	143.75

18			145.25	148.83	149.75

19			151.25	154.83	155.25

20			157.25	160.83	161.75

21			163.25	166.83	167.75

22			169.25	172.83	173.75
ALIGNMENT
Alignment procedure for removing an unwanted carrier on channels 2
to 6
1. Adjust L1 so the sound starts to clear.
2. Adjust L4 for the best sound the picture the picture should also start to clear.
3. Adjust L2 for the best picture and sound.
Adjust L3 several times, the adjustments are critical and 'touchy' be patient and be
careful.
Alignment procedure for removing an unwanted carrier on channels 7
to 22
1. Adjust L1 so the sound starts to clear.
2. Adjust L4 for the best sound the picture.
3. Adjust L2 for the best picture and sound.
4. Repeat steps 1 to 3 several times, the adjustments are critical and 'touchy' be patient
and be careful.
Alignment procedure for 'Snooper' and 'Bullet'
The 'Bullet' and 'Snooper’ are best aligned with a sweep generator or spectrum
analyzer. You must know the exact frequency that is used on your system, and the filter
must be calibrated to that frequency.
BLOCK A CHANNEL
If you want to remove an unwanted channel you would need to use 2 of these filters. One
filter would be adjusted to remove the video information and you would use the other
filter to remove the audio and color information. most of the video information is
contained within a 600 kHz bandwidth, therefore one filter will provide approximately 40
dB of attenuation with a notchwidth of about 600gHz. Typically you will adjust 3 poles of
a 4 pole filter or 2 poles of a 3 pole filter for a frequency about l00 kHz above the
video frequency of the desired channel and the remaining pole would be adjusted to a
frequency approximately 400 MHz higher than the video frequency. (see chart of frequencies
for channels 2 to 22).
BULLET; The "BULLET" is a signal used to turn on and off cable
services. The signal is used some systems to remotely activate / de activate the premium
services supplied by the operator without actually having to go to each location.
Snooper; There is a signal inserted in the cable on some systems that is used to
detect cable leaks and unauthorized equipment, to detect this signal you use a device
called a Snooper.
PART SELECTION CHART
PART   CHANNEL  CHANNEL CHANNEL CHANNEL CHANNEL CHANNEL CHANNEL CHANNEL CHANNEL BULL

#	2-3	4	5-6	7-8	9-10	11-13	14-16	17-19	20-22	SNOOP

C1	2.2pF	2.2pF	2.2pF	2.2pF	2.2pF	2.2pF	2.2pF	2.2pF	2.2pF	2.2p

C2	33pF	22pF	18pF	8.2pF	8.2pF	5.6pF	18pF	12pF	10pE	27pF

C3	22pF	8.2pF	12pF	5.6pF	4.7pF	4.7pF	4.7pF	3.3pF	2.2pF	8.2p

C4	56pF	56pF	33pF	2.2pF	2.2pF	2.2pF	2.2pF	2.2pF	2.2pF	2.2p

C5	56pF	56pF	33PE	8.2pF	8.2pF	5.6pF	18pF	12pS	10pE	27pF

C6	22pF	8.2pF	12pF	----	----	----	----	----    ----    ----

C7	33pF	22pF	18pF	----	----	----	----	----    ----    ----

C8	2.2pF	2.2pF	2.2pF	----	----	----	----	----    ----    ----

L1	3.5Turn 3.5Turn 3.5Turn 3.5Turn 3.5Turn 3-5Turn 3.5Turn 3.5Turn 3.5Turn 3.5T

L2	5.5Turn 5.5Turn 5.5Turn 5.5Turn 5.5Turn 5-5Turn 5.5Turn 5.5Turn 5.5Turn 5.5T

L3	5.5Turn 5.5Turn 5.5Turn 2 1/4 A 2 1/4 A 1 1/2 A 2 1/4 A 2 1/4 A 2 1/4 A 2 1/4A

L4	3.5Turn 3.5Turn 3.5Turn 3.5Turn 3.5Turn 3.5Turn 3.5Turn 3.5Turn 3.5Turn 3.5T
J1 & J2 ----- INSERT AND SOLDER J1 & J2 IN PRINTED CIRCUIT BOARD -----
* NOTE: L3...Some coils inL3 location are marked 2 1/4 A or 1 1/2 A this indicates a
wire wound air coil 5/32" dia. made with enameled wire.
* **** All capacitors and coils must be inserted into printed circuit board so the body
touches the PC board with very short leads.
* **** INSERT ALL PARTS ON FIBER SIDE AND SOLDER ON SILVER SIDE
|